Quick Answer
Shut off the water to the irrigation system, set the controller to off or rain mode, drain every low point and manually open each zone valve so trapped water can escape.
In anywhere that freezes hard, draining alone is not enough. You need a compressed air blowout, done zone by zone at low pressure, or a professional to do it for you.
Aim to finish two to three weeks before your area's average first hard freeze. Waiting for the forecast to threaten is how people end up with a split backflow preventer.
To winterize a sprinkler system you shut off supply, drain the lines, and protect the backflow device.
Why Frozen Lines Cost So Much
Water expands roughly nine percent when it turns to ice. In a sealed pipe there is nowhere for that expansion to go, so the pipe, the fitting or the valve body takes the load instead.
Buried polyethylene lines often survive because the soil insulates them and the pipe flexes. The parts that break are the ones above ground and the ones full of standing water: the backflow preventer, the brass valve bodies, sprinkler heads sitting in a shallow bed, and any exposed riser.
A cracked backflow preventer is the expensive one. It is brass, it is code-required in most places, and replacing one is a plumber's visit rather than a hardware store fix.
Step One: Shut Off and Power Down
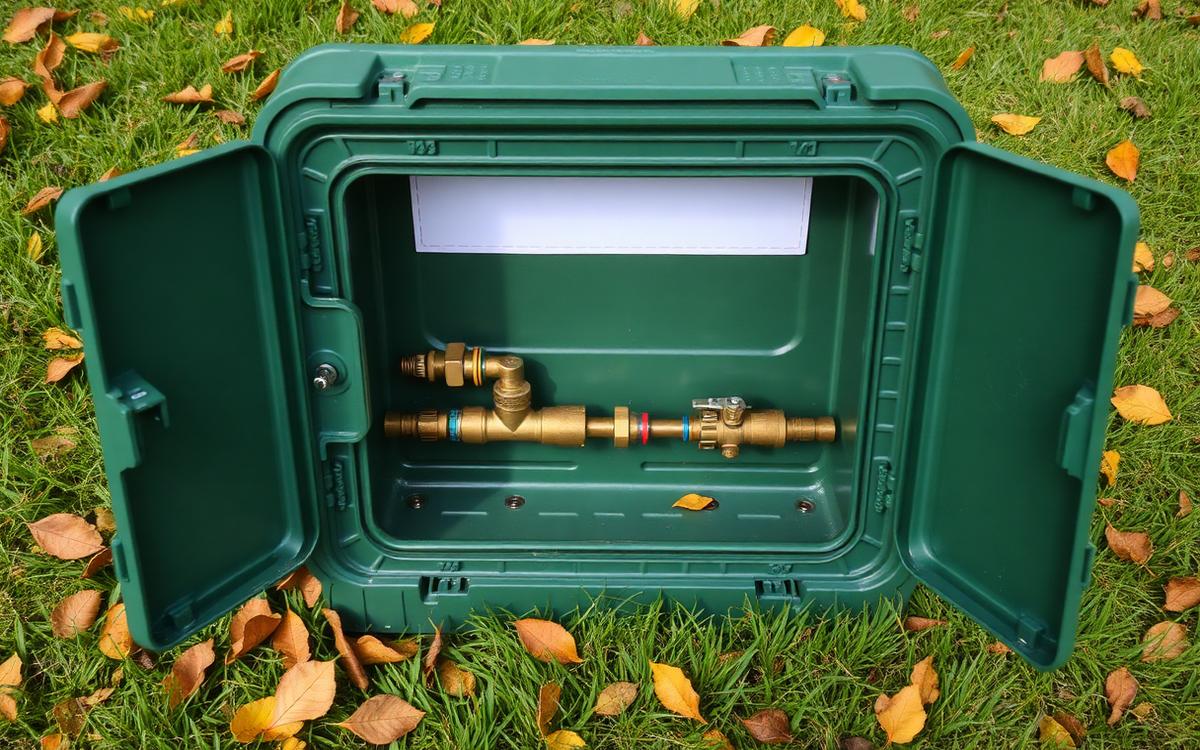
Find the isolation valve that feeds the irrigation system. It is usually in a basement, crawl space, utility room or an outdoor box near the meter, and it is separate from the main house shutoff.
Close it fully. Then set the controller to the off position rather than unplugging it, because many controllers hold programme settings in memory better when powered. If yours has a rain or seasonal off mode, use that.
If you have a smart controller, disable the schedule in the app as well. Plenty of people winterise the pipes perfectly and then let the controller open a valve in December.
Step Two: Get the Water Out
There are three drainage methods, and which one applies depends on how your system was built.
| Method | How it works | Suits |
|---|---|---|
| Manual drain | You open drain valves at the low points yourself | Simple systems with accessible valves |
| Automatic drain | Valves open on their own when pressure drops below about 10 psi | Systems designed with them, mild climates |
| Blowout | Compressed air pushes water out through the heads | Hard freeze regions and any system with flat runs |
With manual or automatic drains, open the valves, let the water run out, then activate each zone briefly at the controller so residual pressure in the valve bodies releases. Leave the drains open through the winter.
The catch is that gravity only removes water from lines that actually slope. Most residential systems have flat sections, and in a hard freeze region that leftover water is exactly what breaks things. That is why blowout is the standard in cold climates.
The Blowout Method, Done Safely
This is the step where enthusiasm causes damage. Compressed air moving through a dry pipe generates heat, and too much pressure launches sprinkler heads and cracks fittings.
- Keep pressure at or below about 50 psi for rigid PVC systems and about 80 psi for flexible polyethylene, or lower if your manual says so.
- Never exceed the pressure rating in the manufacturer documentation, and never use a small pancake compressor with the regulator wound up to compensate for low volume.
- Run one zone at a time, starting with the zone furthest from the compressor, and always open a zone before introducing air.
- Give each zone about one to two minutes, or until the heads spit mist instead of water, then move on.
- Never leave air running through a closed system, and never stand over a head while a zone is charged.
- Wear eye protection. Grit exits those nozzles at speed.
Volume matters more than pressure. A compressor that delivers real airflow at low pressure clears a zone properly, whereas a small tank at high pressure just makes noise and risk. If you do not have suitable equipment, hiring a contractor for an hour is cheaper than a repair.
Protecting the Backflow Preventer
After the lines are clear, close the isolation valves on either side of the backflow assembly to roughly the halfway position. Leaving the test cocks slightly open lets any remaining water escape and gives ice somewhere to go if it forms.
Insulate the assembly with an insulated pouch or wrap plus a waterproof outer layer. Do not seal it airtight in plastic bags alone, because trapped moisture makes things worse rather than better.
If yours is a reduced pressure zone assembly, check the manufacturer instructions before removing anything. Some models require the internals to be removed for winter, some do not.
The Rest of the Outdoor Water
While you are out there, deal with everything else that holds water.
- Disconnect, drain and store every garden hose. A hose left attached traps water in the spigot and splits the pipe behind the wall.
- Drain and shut off outdoor taps at their interior shutoff if you have one, then open the outdoor tap to let it clear.
- Empty rain barrels and turn them upside down.
- Blow out drip irrigation lines too. Thin walled drip tubing is more fragile than main line pipe, not less.
- Store hose-end timers indoors. The batteries and the plastic body both hate frost.
Timing It Right
Work back from your local average first hard freeze, meaning a night below about 28 degrees Fahrenheit rather than a light frost. Two to three weeks of buffer is sensible, because the first freeze in any given year can arrive well ahead of average.
The lawn does not need the extra weeks of watering as much as you think. Growth has slowed by then, evaporation is low, and autumn rainfall covers most of what an established lawn needs.
What Spring Startup Looks Like
Reopen slowly. Charging a dry system at full pressure sends a water hammer through the pipes and can break the components you spent autumn protecting.
Open the isolation valve about a quarter turn and let the system fill gradually before opening it fully. Then run each zone, check for geysers from broken heads, clean the nozzle filters and reset the controller schedule for the season.
The Bottom Line
Shut off the supply, kill the controller schedule, drain what gravity will take, and blow out the rest if you live anywhere that freezes properly. Wrap the backflow preventer, disconnect the hoses, and do all of it a couple of weeks earlier than feels necessary.
Frequently Asked Questions
Do I really need a blowout, or is draining enough?
Draining is enough only in mild climates with sloped lines and working drain valves. Anywhere with a hard freeze, blow the lines out.
What pressure should I use for a blowout?
Keep it at or below roughly 50 psi for PVC and 80 psi for polyethylene, and always follow the manufacturer limit.
When should I winterise?
Two to three weeks before the average first hard freeze in your area, not on the night it is forecast.
Will my buried pipes freeze anyway?
Buried lines below the frost line usually survive. The vulnerable parts are valves, heads and the above-ground backflow assembly.
Can I leave the controller plugged in?
Yes, set it to off or rain mode so it keeps programme memory but never opens a valve.
How much does a professional blowout cost?
Typically less than the price of replacing one cracked backflow preventer, which is why it is a reasonable job to outsource.