

Quick Answer
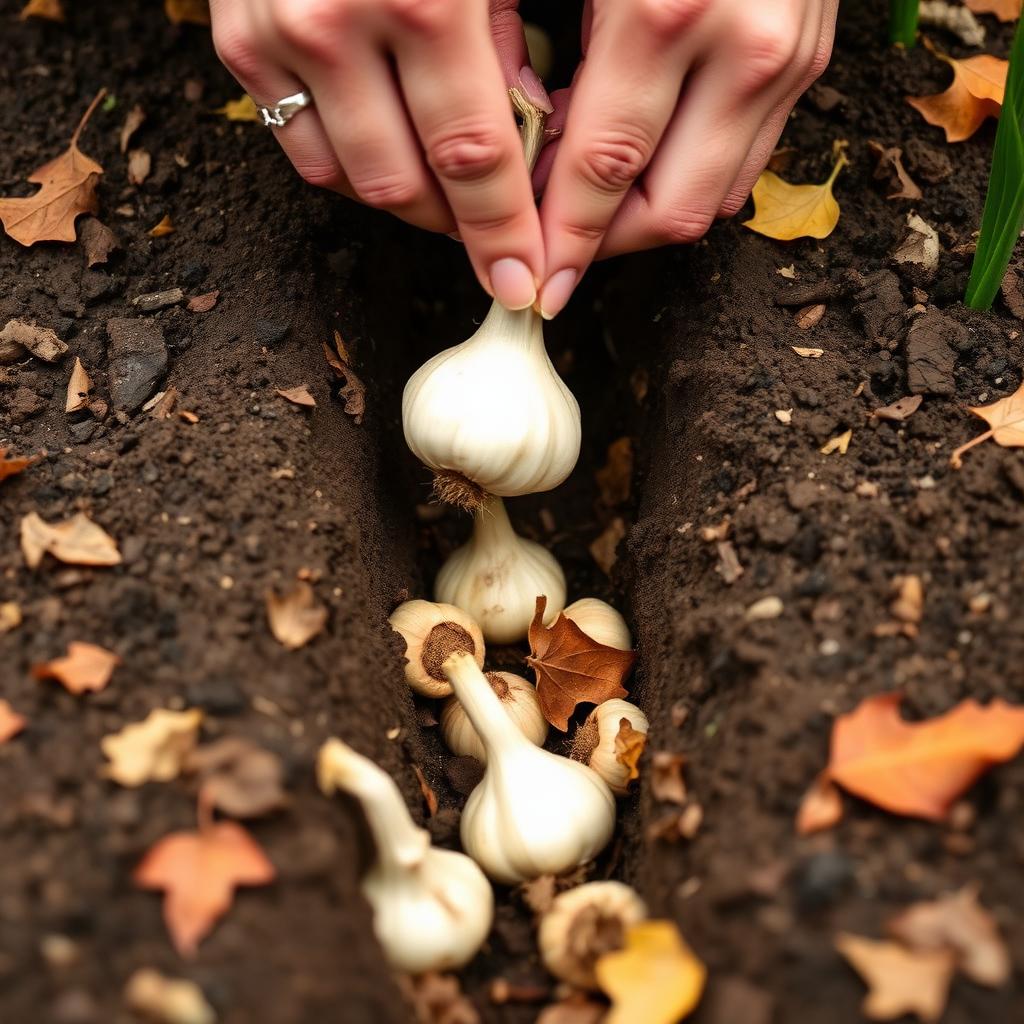
Plant garlic cloves in autumn, four to six weeks before your first hard frost (usually mid-October through late November in the northern hemisphere). Break a head of certified seed garlic into individual cloves, keep the papery skins on, push each clove flat-side down and pointed tip up roughly 3 inches deep, space them 6 inches apart, then cover the bed with 4 to 6 inches of straw or shredded leaves.
You will harvest fat, aromatic bulbs the following summer when the lower leaves begin to brown.
Why Garlic Wants the Cold
Garlic (Allium sativum) needs a period of cold temperatures (a process called vernalization) to trigger bulb formation. Plant in spring and you get a single round bulb the size of a marble. Plant in autumn and the cloves spend winter pushing roots and absorbing that vital chill, then explode into growth as soon as the soil warms in spring.
Garlic Cultivation Specifications
| Parameter | Standard |
|---|---|
| Planting window | Autumn, 4 to 6 weeks before hard frost |
| Clove depth | 2 to 3 inches (measured from base plate) |
| Spacing | 6 inches in row, 12 inches between rows |
| Orientation | Flat root plate down, pointed tip up |
| Mulch depth | 4 to 6 inches of clean straw |
Step 1: Source Real Seed Garlic
Never plant supermarket garlic. It is often treated with sprout inhibitors, frequently imported from regions that carry white rot (a soil-borne fungus that ruins beds for decades), and rarely suited to your climate. Buy certified disease-free seed garlic from a reputable nursery or seed company.
Pick a variety that suits your region. Hardneck varieties (Music, German Extra Hardy, Spanish Roja) handle harsh winters and produce edible scapes; softneck varieties (Inchelium Red, California Early) store longer and braid beautifully.
Step 2: Break and Sort
Keep the heads whole until planting day. Just before you head outside, snap the head apart into individual cloves, leaving the protective papery wrapper on each one. Sort by size and plant only the fattest outer cloves; the small inner ones go to the kitchen because they would produce stunted heads.
Step 3: Prepare the Bed
Garlic wants full sun and rich, loose, well-drained soil with a pH between 6.0 and 7.0. Dig in two inches of finished compost and a balanced organic fertiliser. Heavy compacted clay produces deformed bulbs, so improve drainage with sand or build a raised bed if needed.
Step 4: Plant With Correct Orientation
Open a trench 3 inches deep. Pick up a clove and identify the two ends. The flat, rough, slightly concave base is the basal plate where roots emerge. The opposite end tapers to a point where the green shoot will rise.
Press the clove firmly into the trench with the basal plate flat against the soil and the pointed tip aimed straight up. Plant upside down and the emerging shoot has to loop around itself to find the sky, draining energy and producing a misshapen small bulb. Space cloves 6 inches apart, with rows 12 inches apart.
Step 5: Mulch Heavily
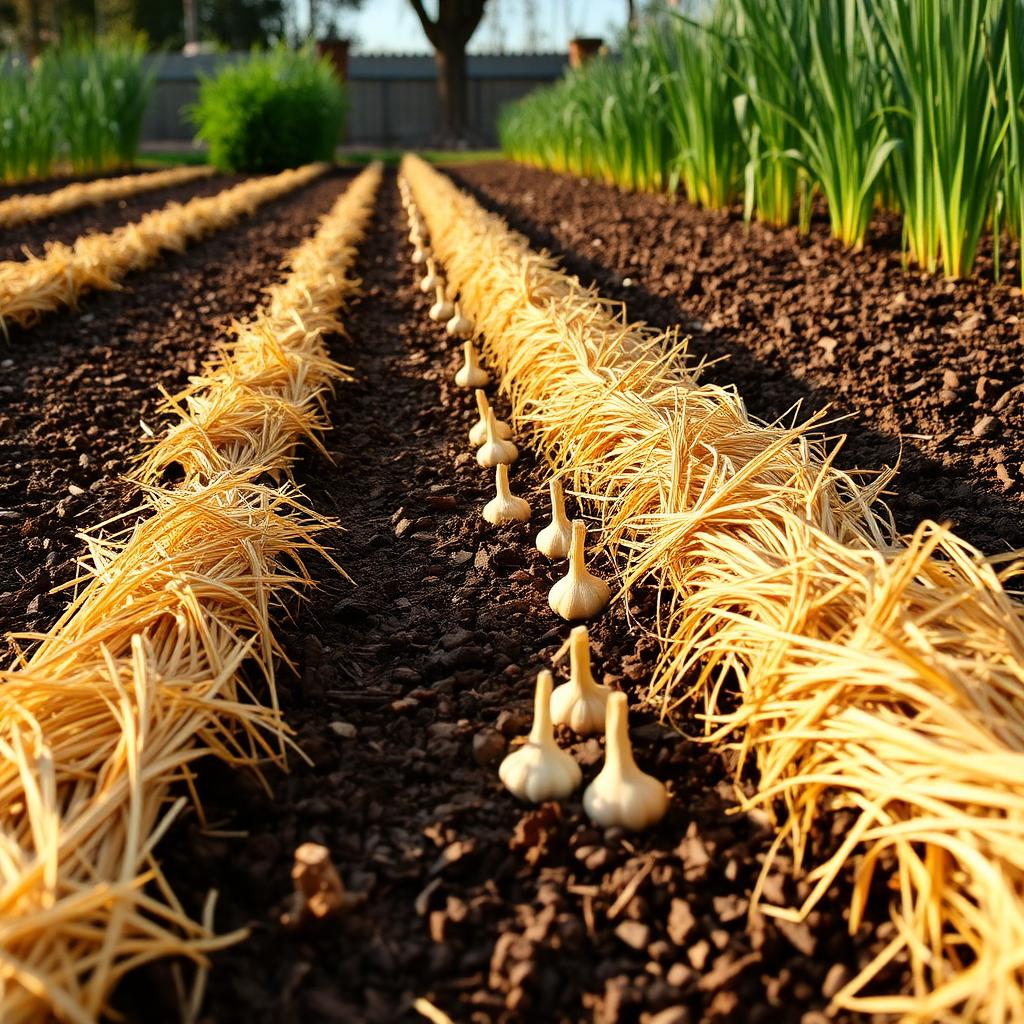
Backfill the trench and water once to settle the soil. Then cover the entire bed with 4 to 6 inches of clean wheat or oat straw, shredded leaves, or pine needles. The mulch insulates the soil against temperature swings that would heave cloves out of the ground, suppresses spring weeds, and holds moisture during the dry early summer when the bulbs are sizing up.
Spring and Summer Care
Green shoots push through the mulch in early spring. Side-dress with a high-nitrogen fertiliser (such as blood meal) in March and again in late April to fuel leaf growth, because more leaves equals a bigger bulb.
If you planted hardneck varieties, you will see curling flower stalks (called scapes) in late spring. Snap them off at the base when they make one full curl; this redirects energy back into the bulb and gives you a free crop to stir-fry.
Stop watering two weeks before harvest to firm up the wrappers.
When and How to Harvest
Garlic is ready when the lowest three or four leaves have turned brown but five or six green leaves remain at the top. Each green leaf equals one wrapper around the bulb; you want at least four wrappers for good storage. Dig (do not pull) carefully with a fork to avoid bruising. Cure the whole plants in a shaded, airy spot for two to three weeks before trimming.
The Takeaway
Plant certified seed garlic in autumn with the pointed tip up, mulch deeply, feed in spring, and harvest when the lower leaves brown. Follow this calendar and a single $15 packet of seed garlic will yield a year's supply of bulbs.


