

Quick Answer
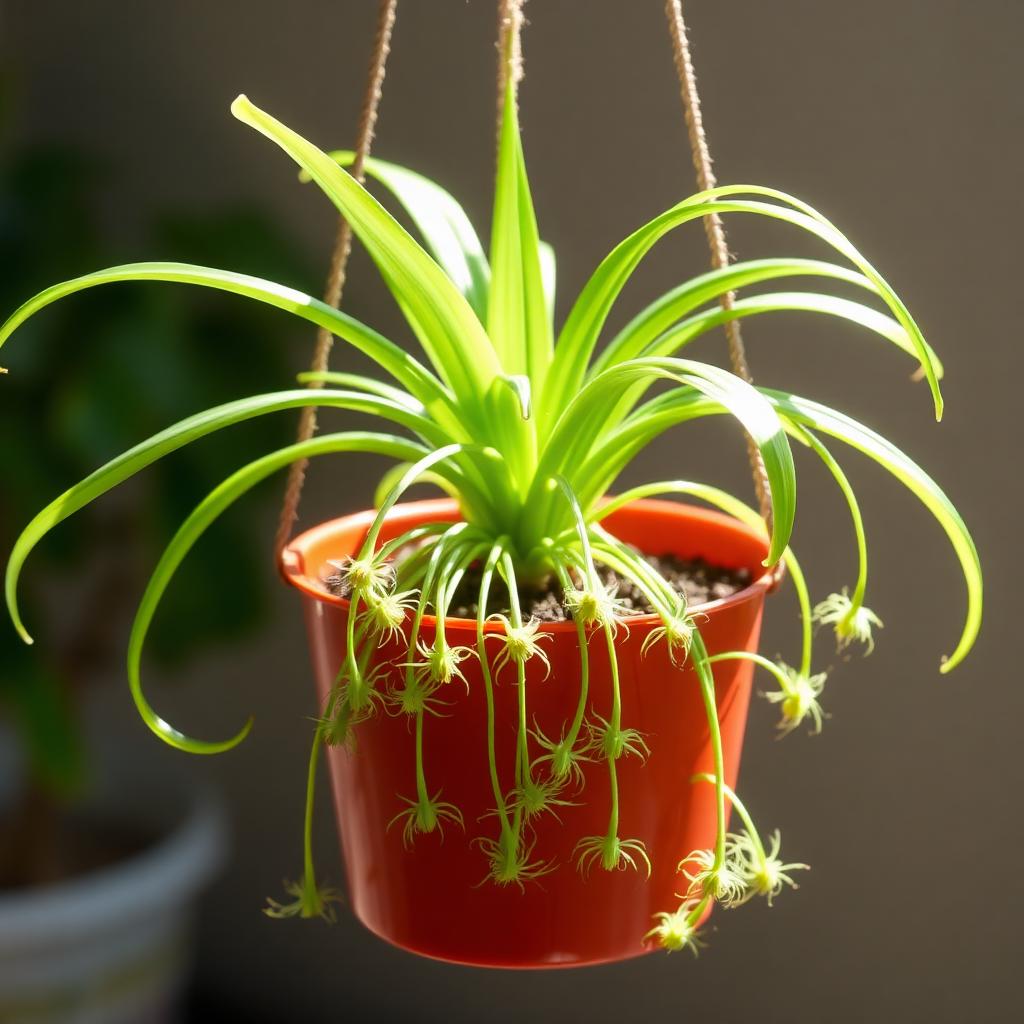
Spider plants reproduce themselves by sending out long runners tipped with tiny baby plants called spiderettes or pups. To propagate, snip a mature pup off the runner and either suspend it in water for 7 to 10 days or push it straight into damp potting mix.
A pup is ready when you see small brown root nubs on its underside. Bright indirect light, room temperature water, and a small starter pot are all the kit you need.
What Makes Spider Plants So Easy to Multiply
Spider plants, Chlorophytum comosum, evolved in tropical Africa to spread quickly along the forest floor. When a mature plant is happy, it shoots out long thin stems called runners. Each runner produces tiny clones of the mother plant.
Those baby plants, the spiderettes, already have the genetic and structural equipment to grow roots the moment they touch water or damp soil. That is why a single healthy spider plant can fill a window with free plants in one season.
How to Tell a Pup Is Ready
Look at the base of each spiderette. You want to see a cluster of small brown or pale knobs underneath the leaves. These are aerial root initials, primed to grow.
- A pup with no root nubs is too young. Wait a few weeks until they form.
- A pup with tiny white roots already showing is perfect.
- Choose pups at least 2 inches wide for the strongest start.
Method 1: Rooting in Water
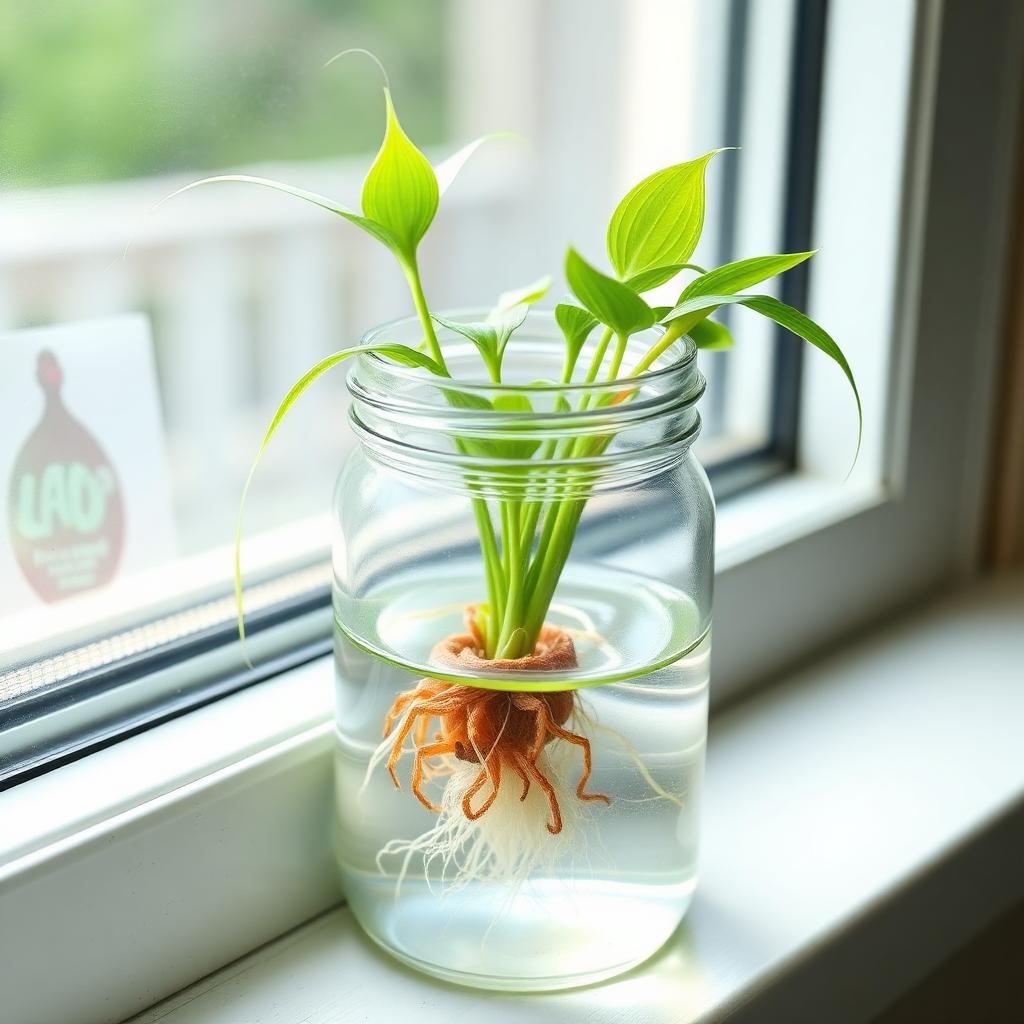
This is the most popular method because you can watch the roots grow in real time.
- Use clean shears to snip the pup off the runner, leaving a half inch tail of stem.
- Fill a small jar or shot glass with filtered or rested tap water.
- Rest the pup on the rim so only the brown base sits in water. Keep the leaves dry.
- Place in bright indirect light and change the water every two to three days.
Within 7 to 10 days you will see a fluffy network of white roots. Once roots reach about 2 inches long, pot the pup into standard houseplant soil and water lightly.
Method 2: Direct Soil Rooting
Water roots are fragile and have to adjust when they hit soil. Rooting directly in soil skips that step and builds tougher roots from day one.
- Fill a 3 inch pot with a mix of 50 percent potting soil and 50 percent perlite.
- Moisten the mix and poke a small hole in the center.
- Press the base of the spiderette firmly into the hole and pat the soil around it.
- Mist daily or water lightly when the surface feels dry.
Place the pot in bright indirect light. Within 2 to 3 weeks a gentle tug will meet resistance, which means roots have anchored. Fresh green growth from the center crown is your signal that propagation worked.
Method 3: Rooting While Still Attached
If you are nervous about cutting, you can root pups while they remain on the mother plant. Place a small pot of damp soil next to the mother, lay the still attached pup on the soil, and weight it with a small stone or hairpin.
Keep the soil damp. After about two weeks roots will anchor into the new pot. Snip the runner connecting the pup to the mother and you have an independent plant with zero transplant stress.
Care for New Spider Plant Babies
Once your pup is potted, give it the same basic care that suits adult spider plants:
- Bright indirect light. Direct midday sun scorches the leaves.
- Water when the top inch of soil feels dry. Spider plants tolerate occasional drought but hate soggy roots.
- Average household humidity and temperatures between 18 and 24 degrees Celsius.
- A diluted balanced houseplant fertilizer once a month during spring and summer.
Spider plants are sensitive to fluoride and chlorine in tap water. If leaf tips turn brown, switch to filtered or rainwater.
The Takeaway
Few houseplants are kinder to first time propagators than the spider plant. Wait until your pup has small root nubs, choose water or soil based on your style, and within a few weeks you will have a brand new houseplant for free. Gift the extras, fill a windowsill, or start a propagation station that grows itself.


